If you don’t have a MailChimp account, you can sign up for one here.
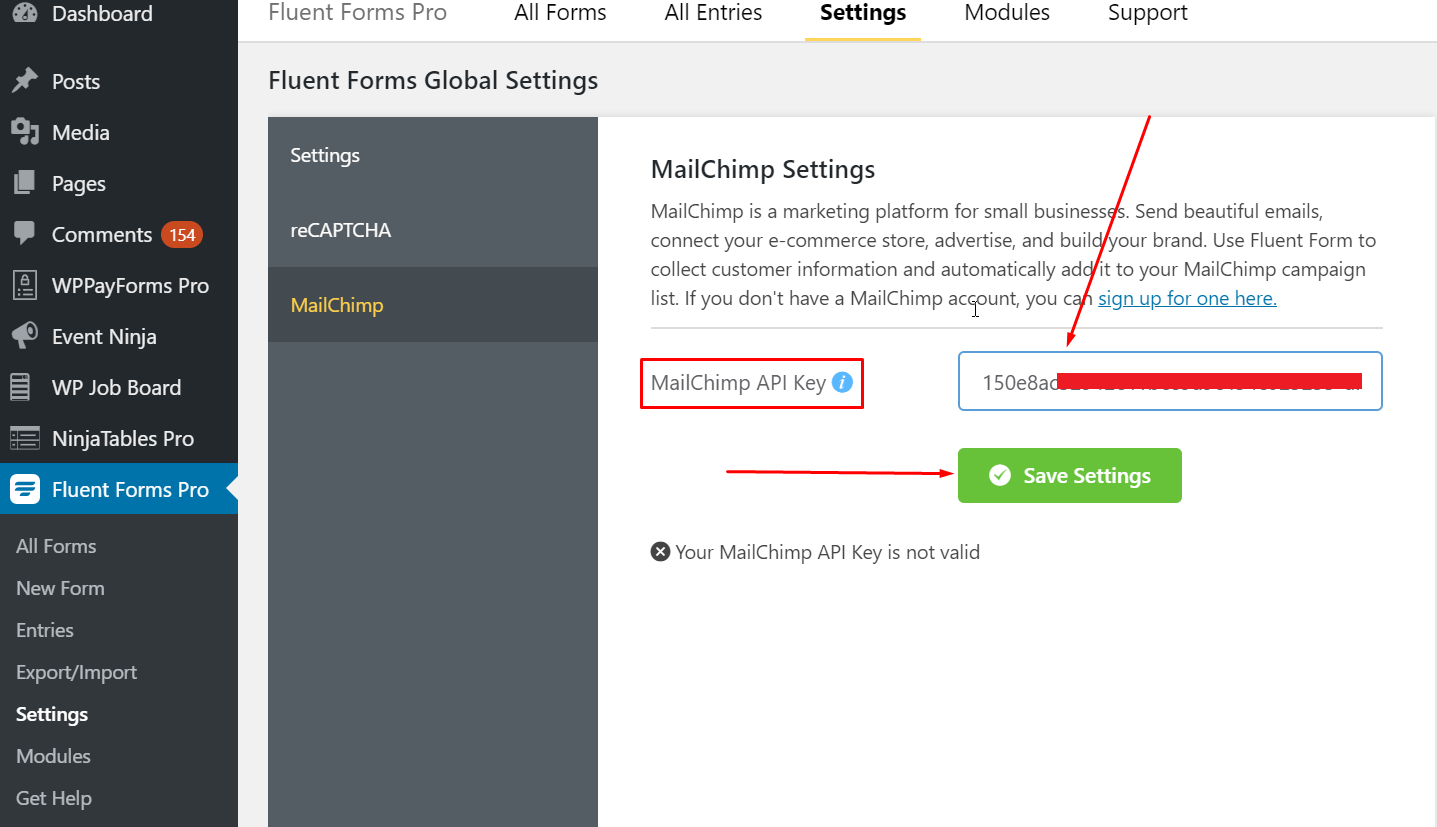
- Enter your MailChimp API Key.
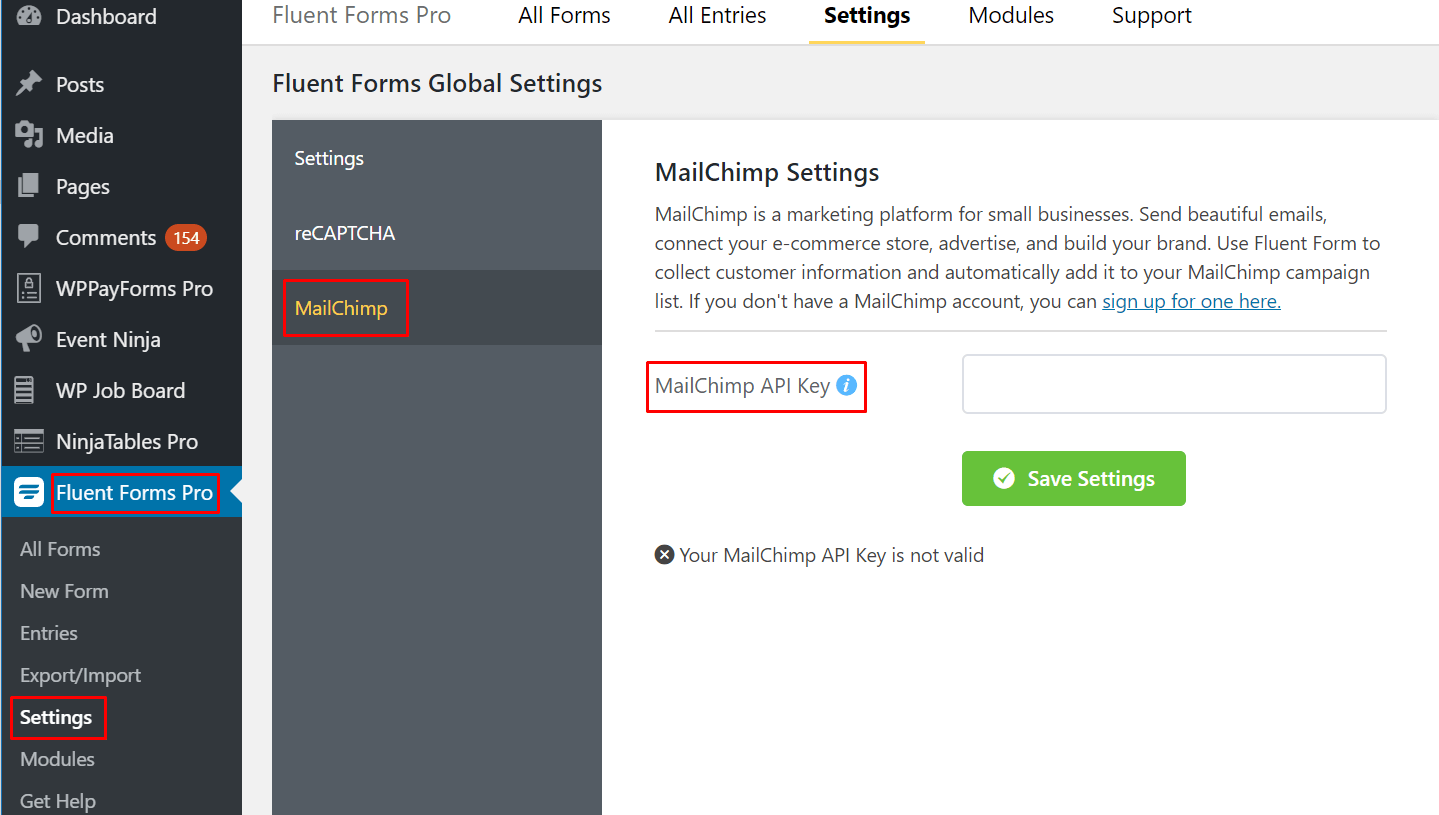
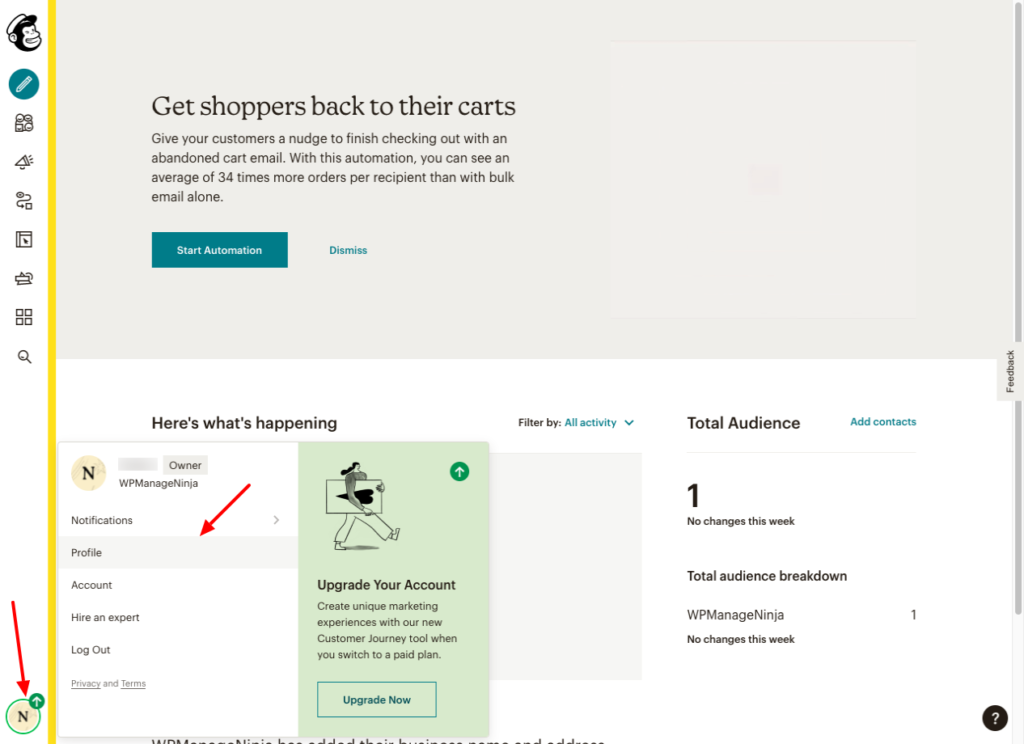
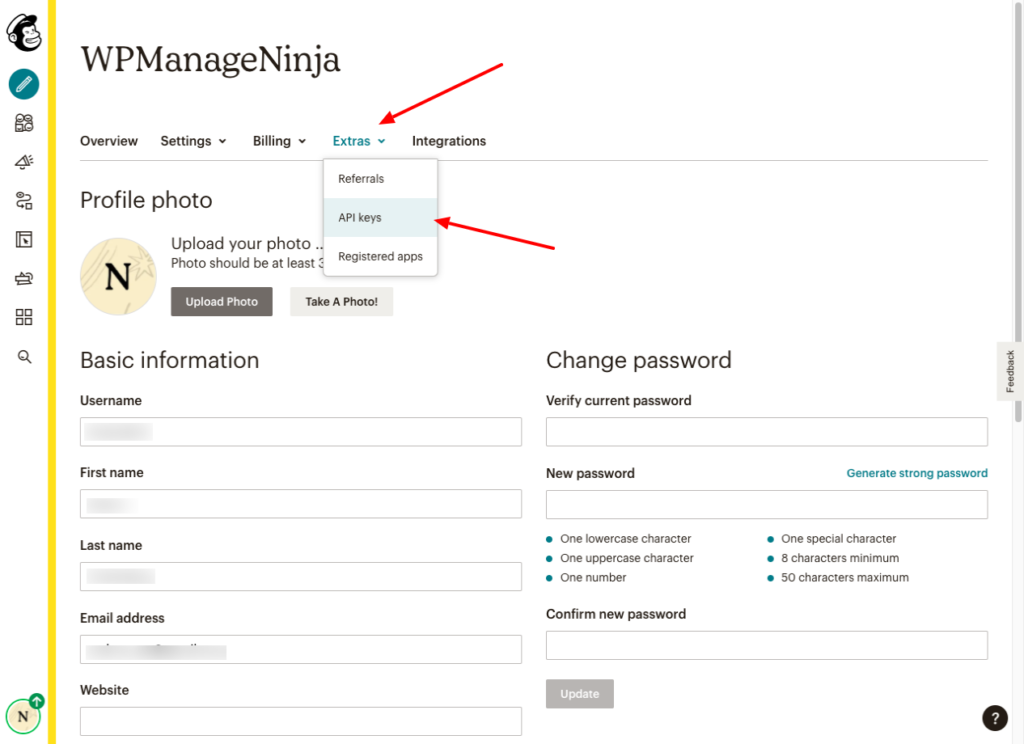
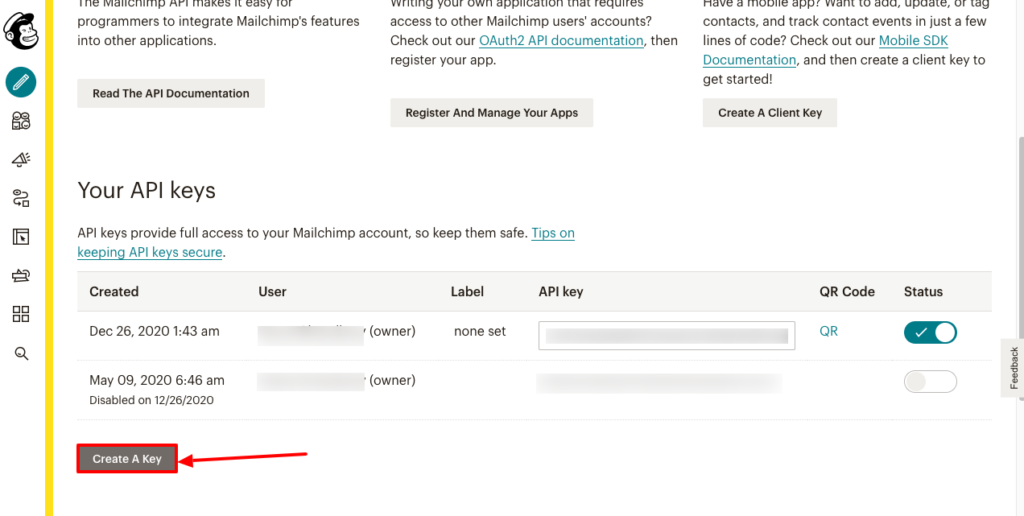
- If you do not have an API key, please log in to your MailChimp account and go to Profile>Extras>API Keys.
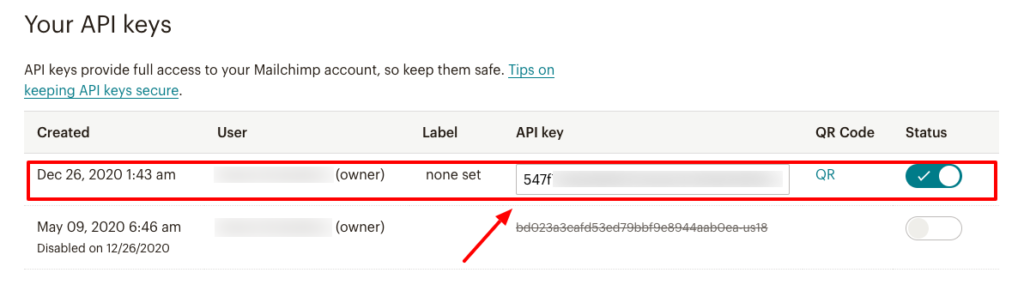
- Copy the API key and paste it in WP Fluent Form MailChimp Settings panel and click on Save Settings.
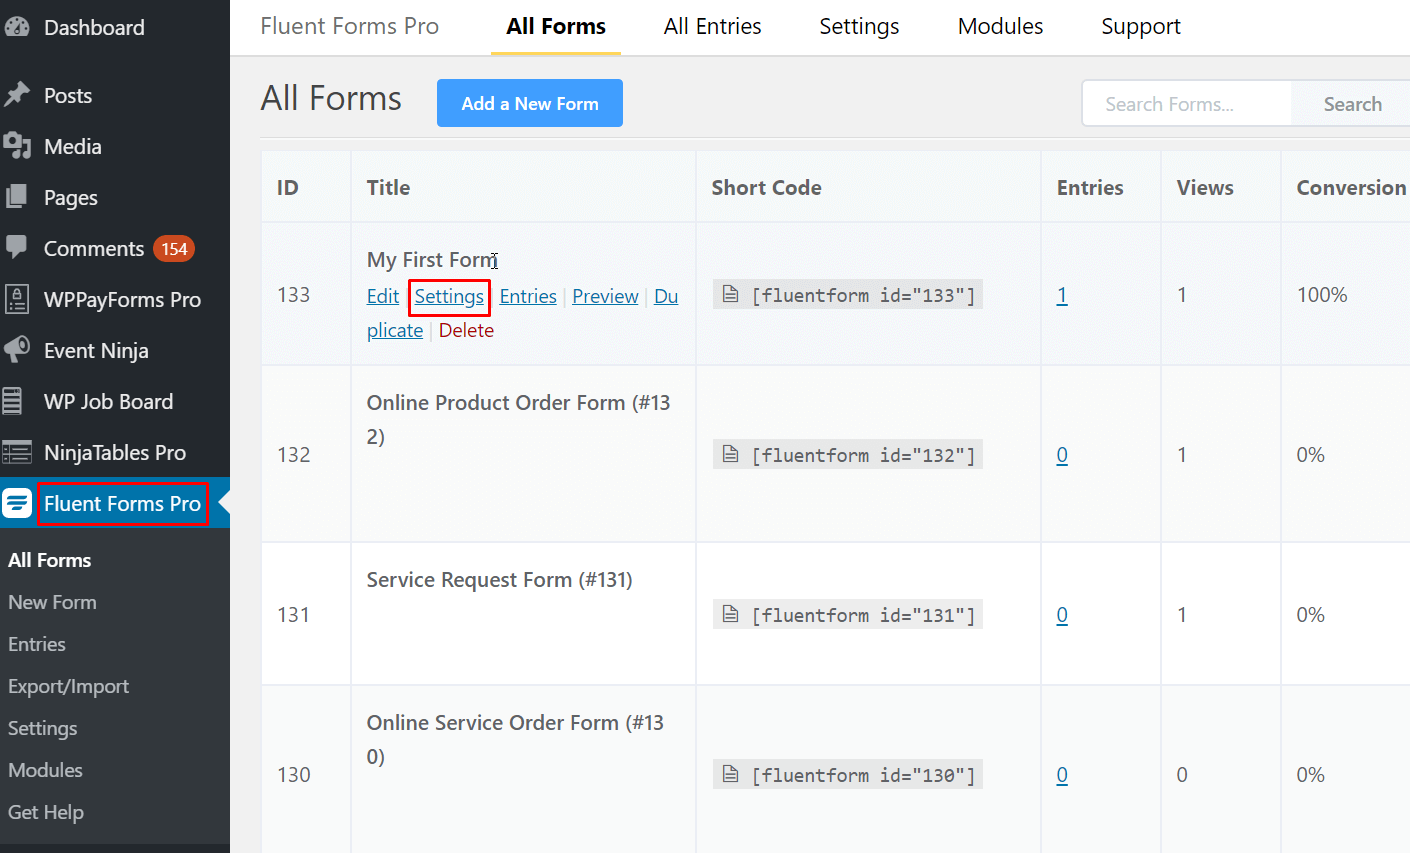
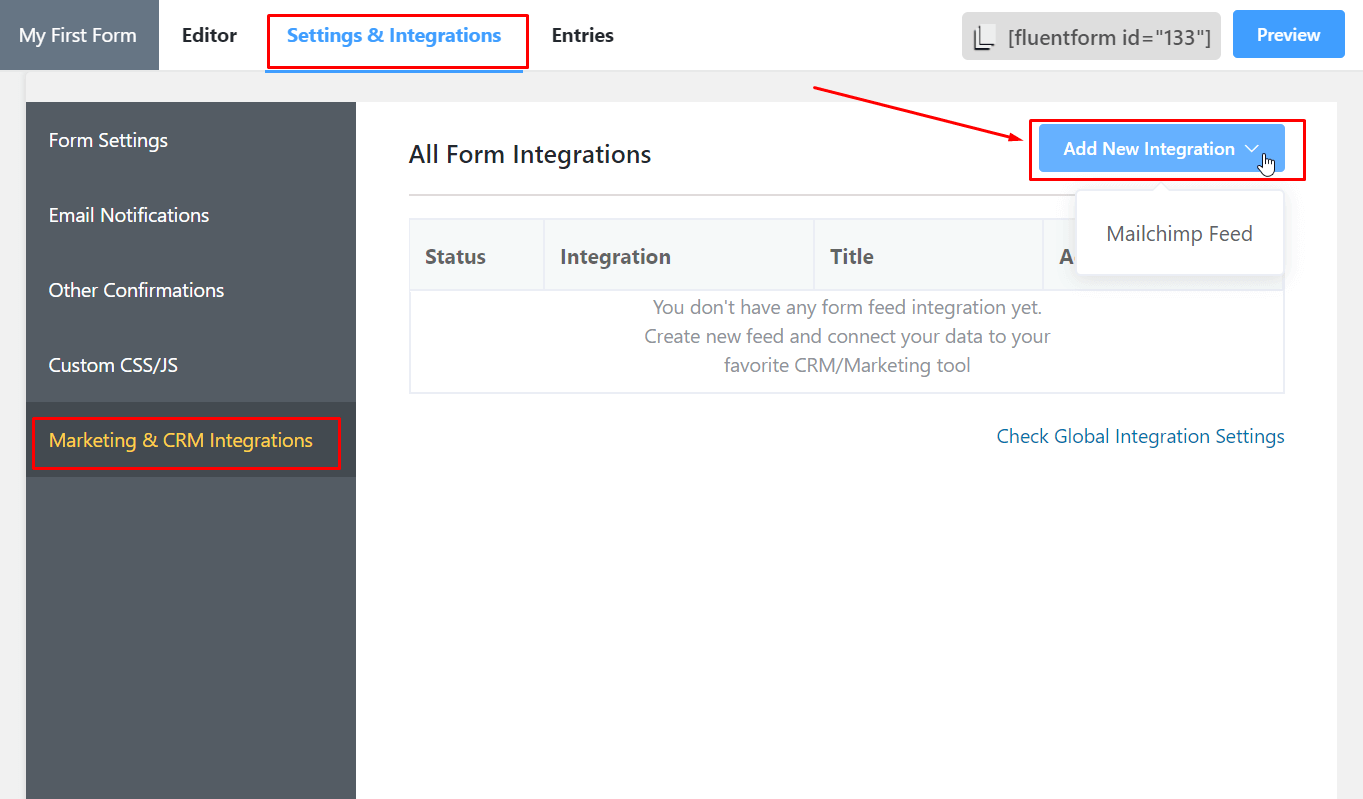
- Go to All Forms and select the form you want to integrate with your MailChimp account. Go to Settings (Top bar) > MailChimp (Sidebar)
- Click on Add New Integration. Choose the integration you want for example Mailchimp
- Configure the settings according to your requirements.
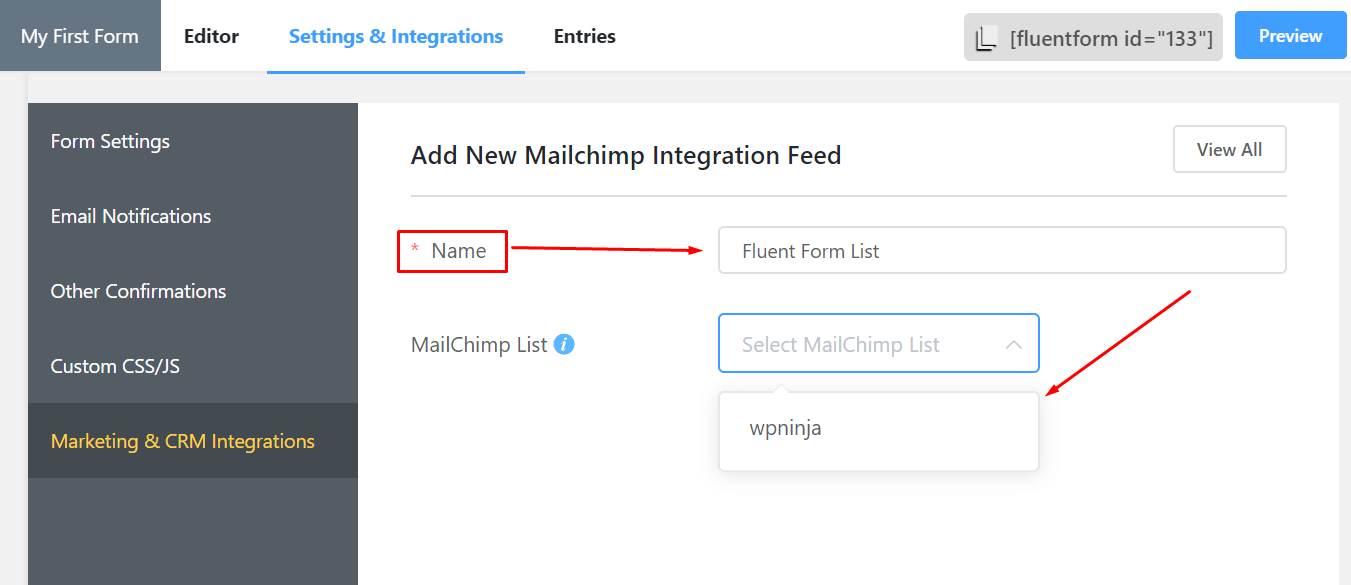
- Name the list, select the MailChimp list the data is to be fed in from the Dropdown list.
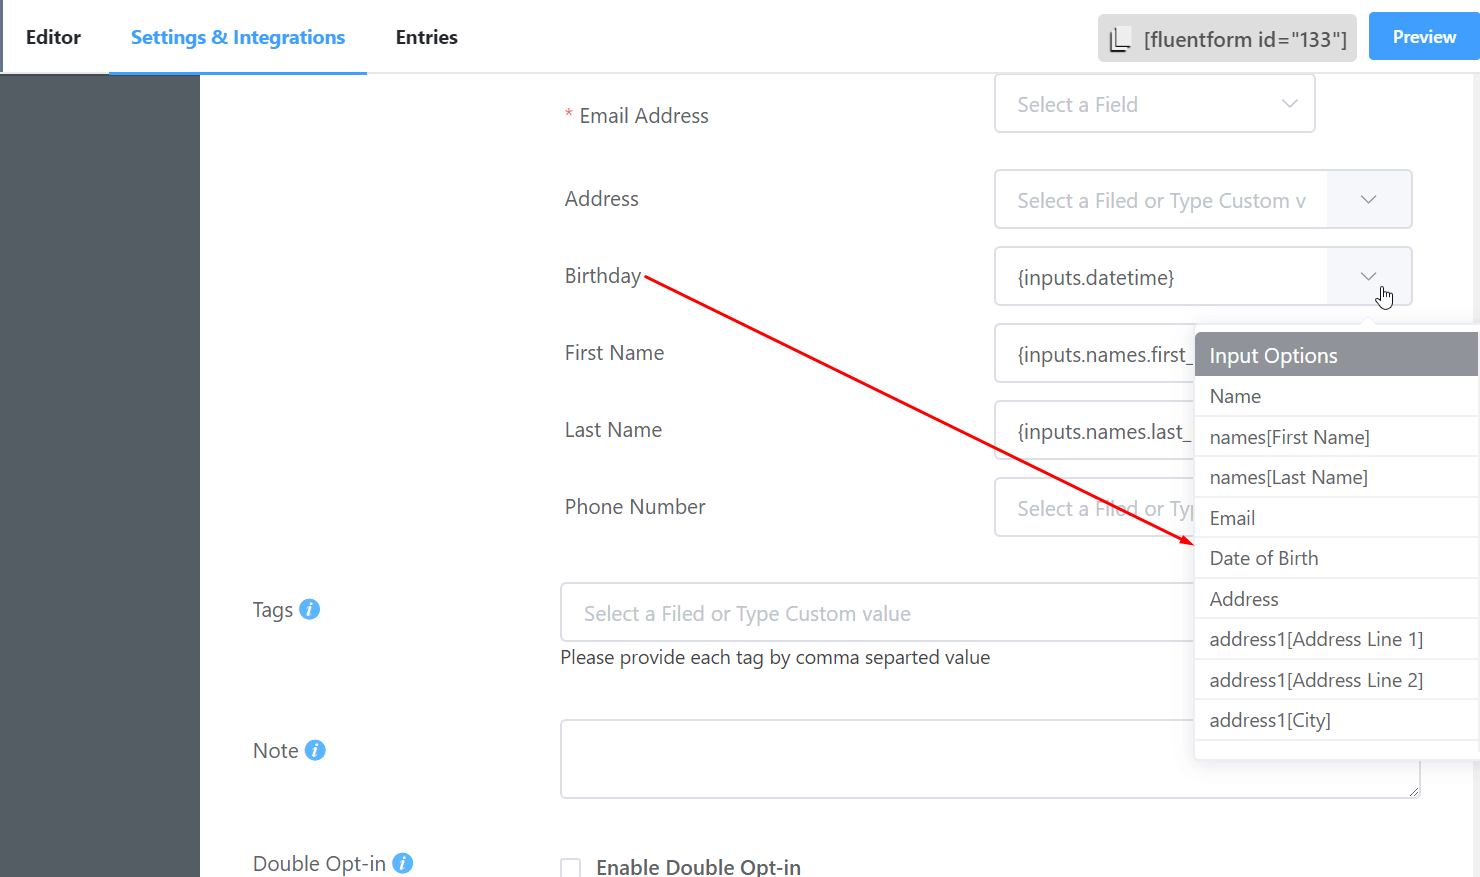
- Configure Field Mapping. Correlate the MailChimp Fields with the form’s input fields (e.g. Email Address with Email, First Name with names[First Name], Last Name with names[Last Name], Birthday with Date of Birth etc)
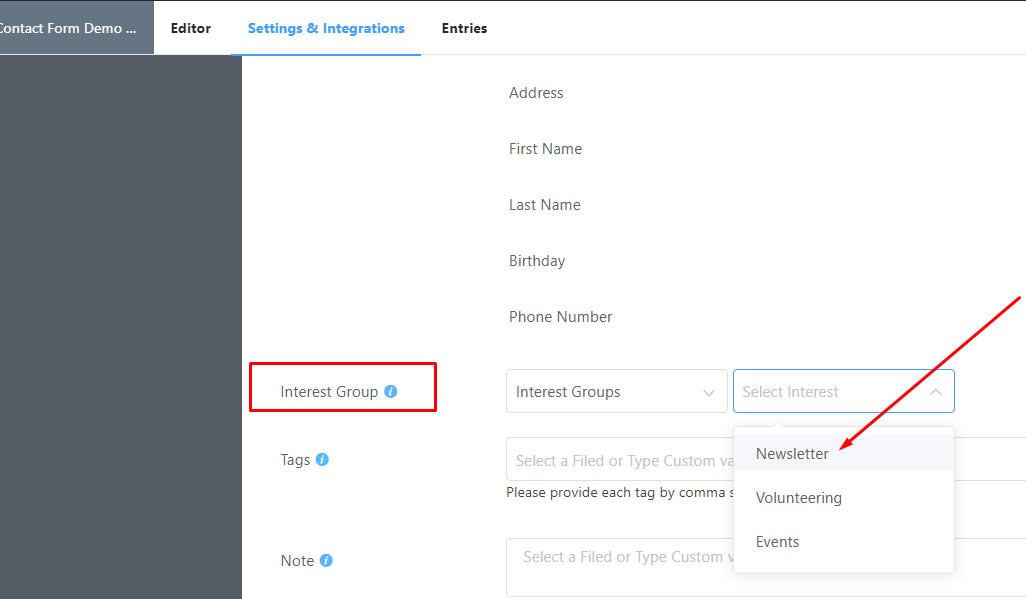
You can add users to groups for better segmentation & targeting. Groups can help to sort your subscribed contacts based on their interests and preferences. A Subscriber can subscribe to multiple groups without signing up for multiple lists.
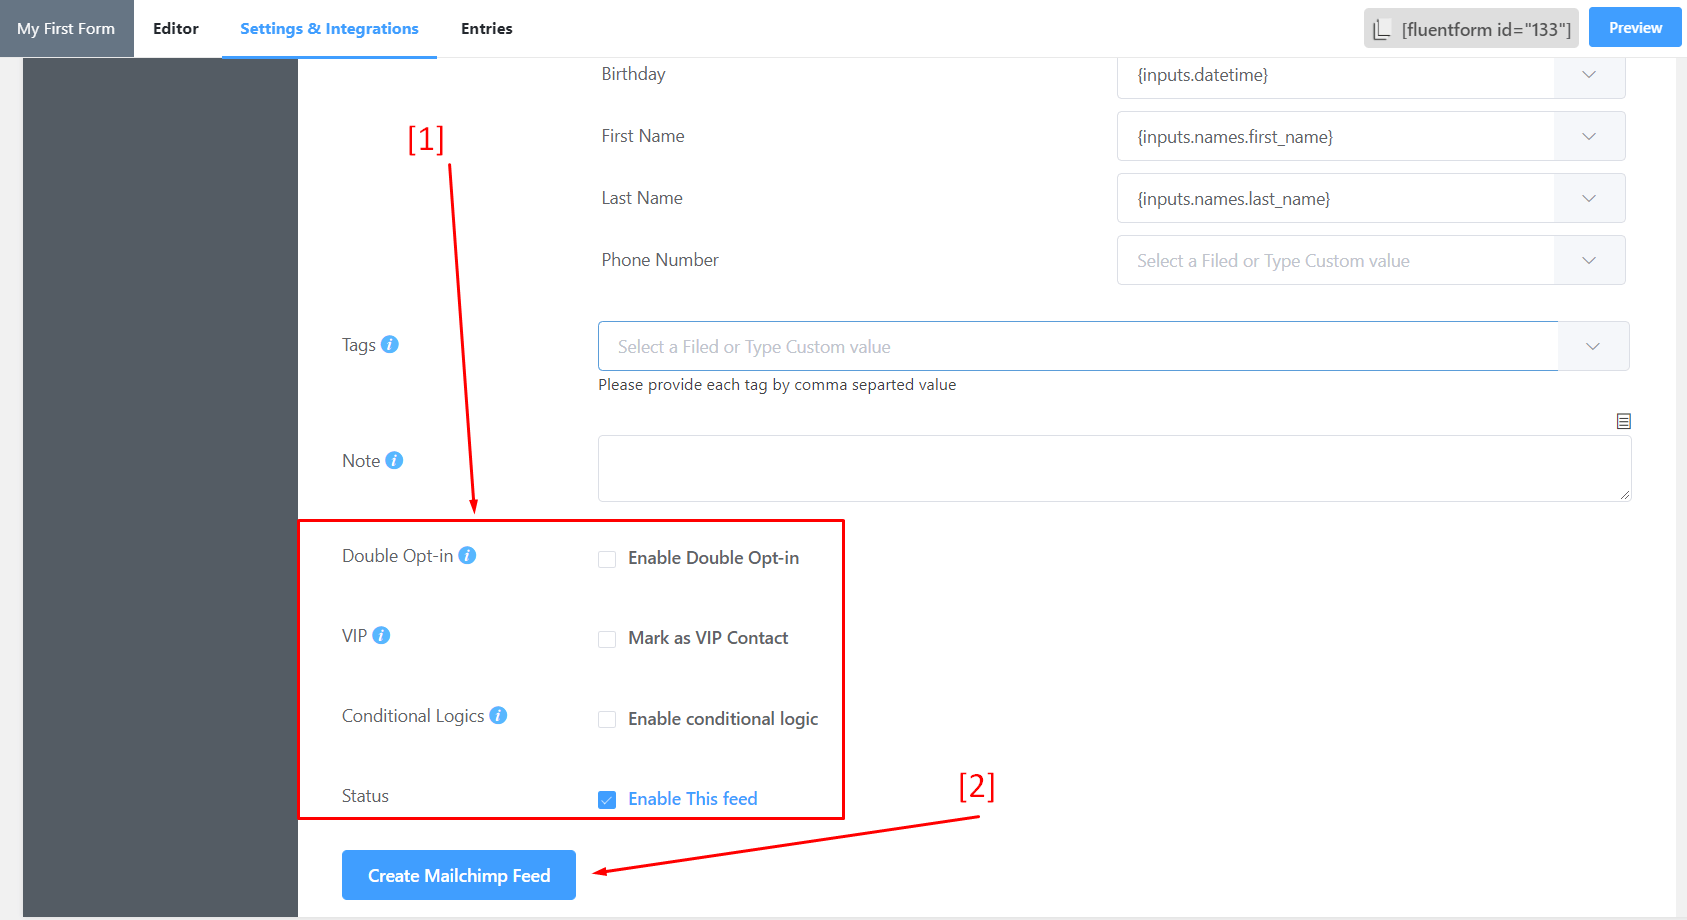
- Toggle on/off Double Opt-in, Mark Subscriber as VIP if needed. When the double opt-in option is enabled, MailChimp will send a confirmation email to the user and will only add them to your MailChimp list upon confirmation.
- Set Conditional Logic if necessary. This Conditional Logic can be set just like the regular Conditional Logic and if subscribers will be added to list only if they satisfy the conditions set.
- Click Update MailChimp Feed to finalize your settings.