You can see this video or follow steps by steps instructions bellow. If you are following this video, you need to Re-Authenticate Access Token later.
Configuring Fluent SMTP with Gmail or Google WorkSpace Emails #
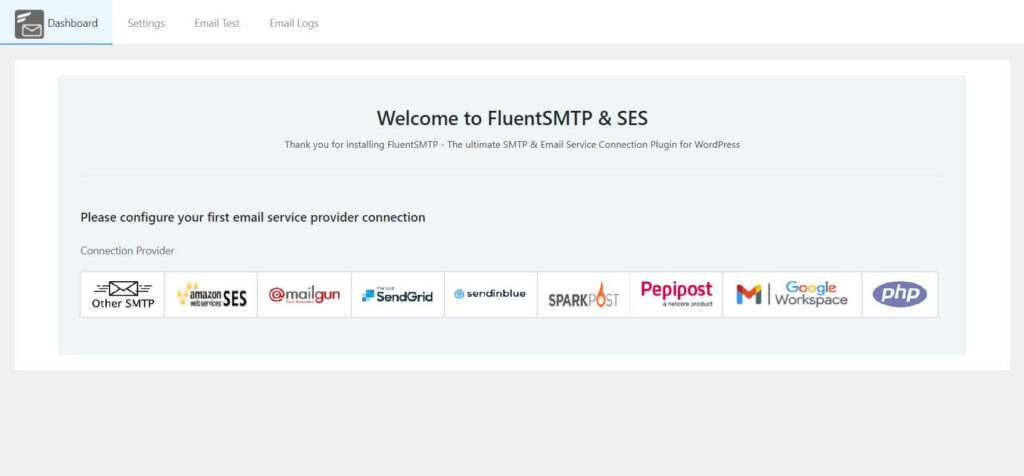
Hover over settings and go to Fluent SMTP Dashboard. If this is the first time you are using Fluent SMTP you will see the list of available Mailer, go ahead and select Google WorkSpace.
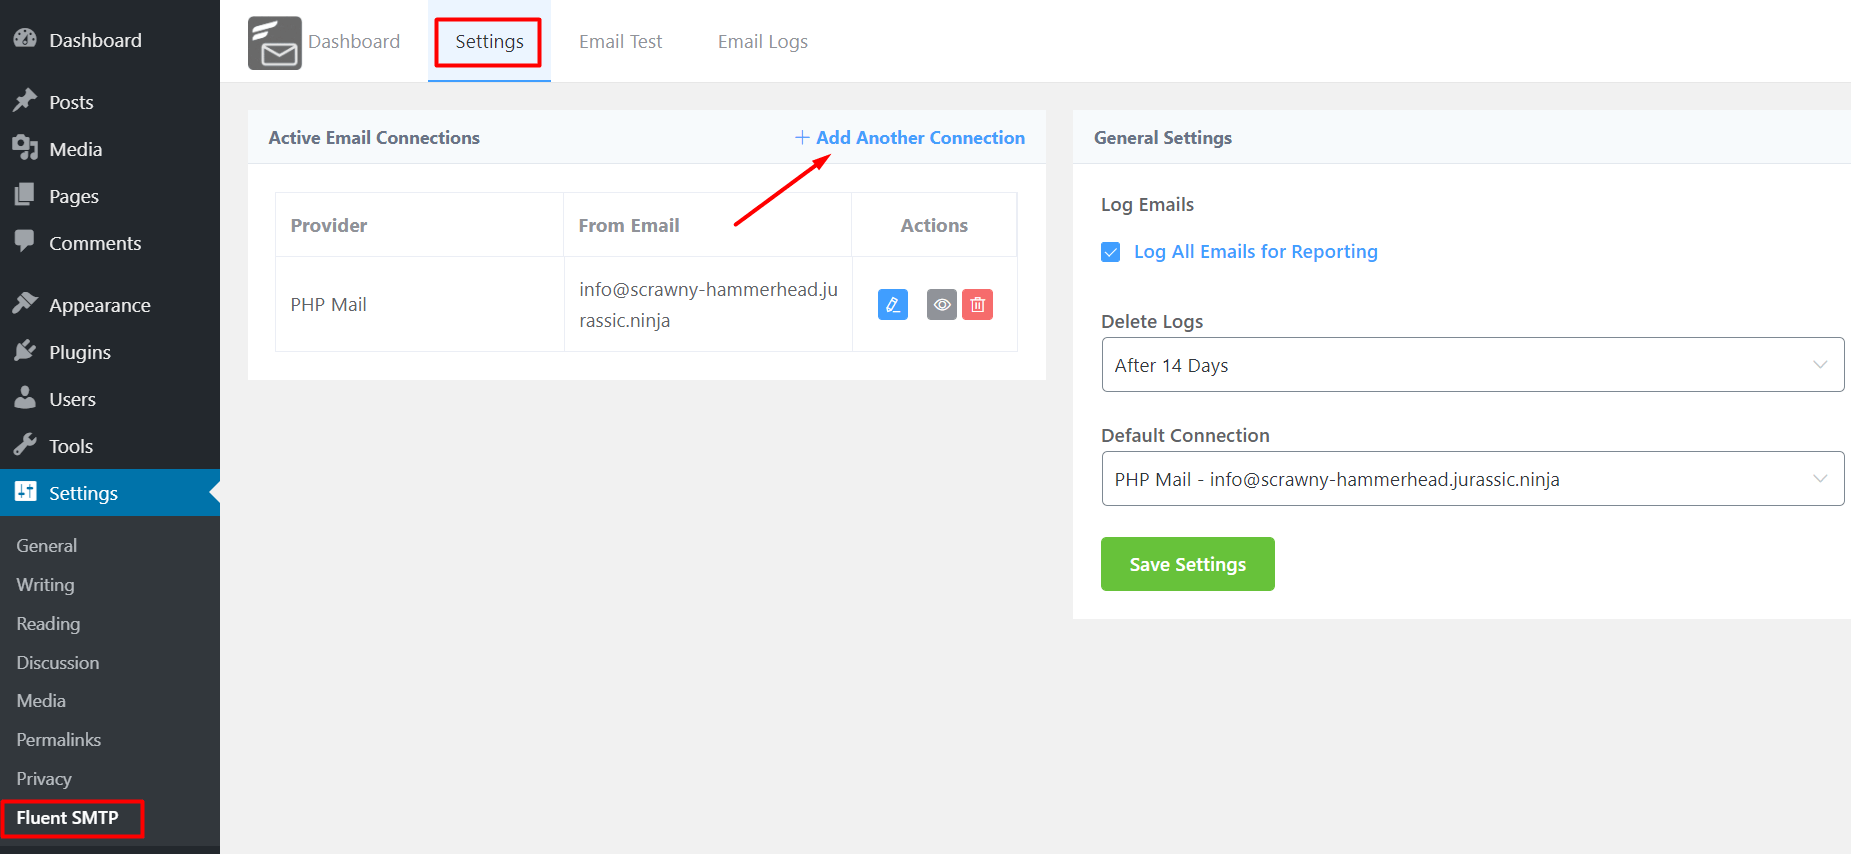
If you already have one or multiple SMTP driver setups and now you want to add MailGun also then go to the Settings Tab of Fluent SMTP and select Add New Connection. Now again all the available mailers will appear from where you need to select Google WorkSpace.
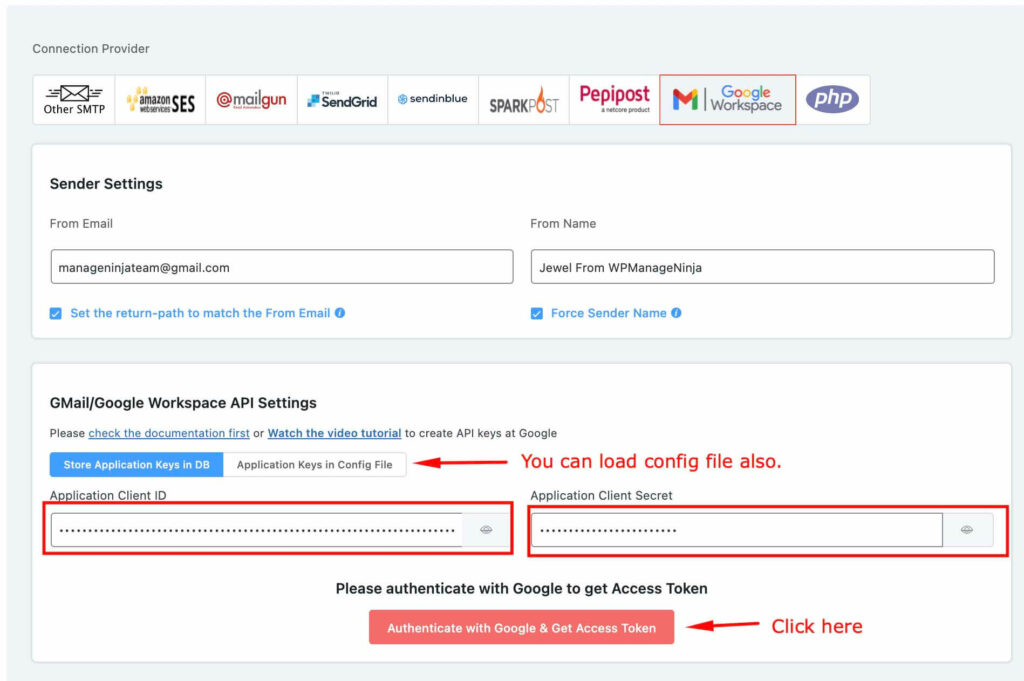
After selecting Google WorkSpace as the mailer, a very simple settings window will open as shown on the screenshot below.
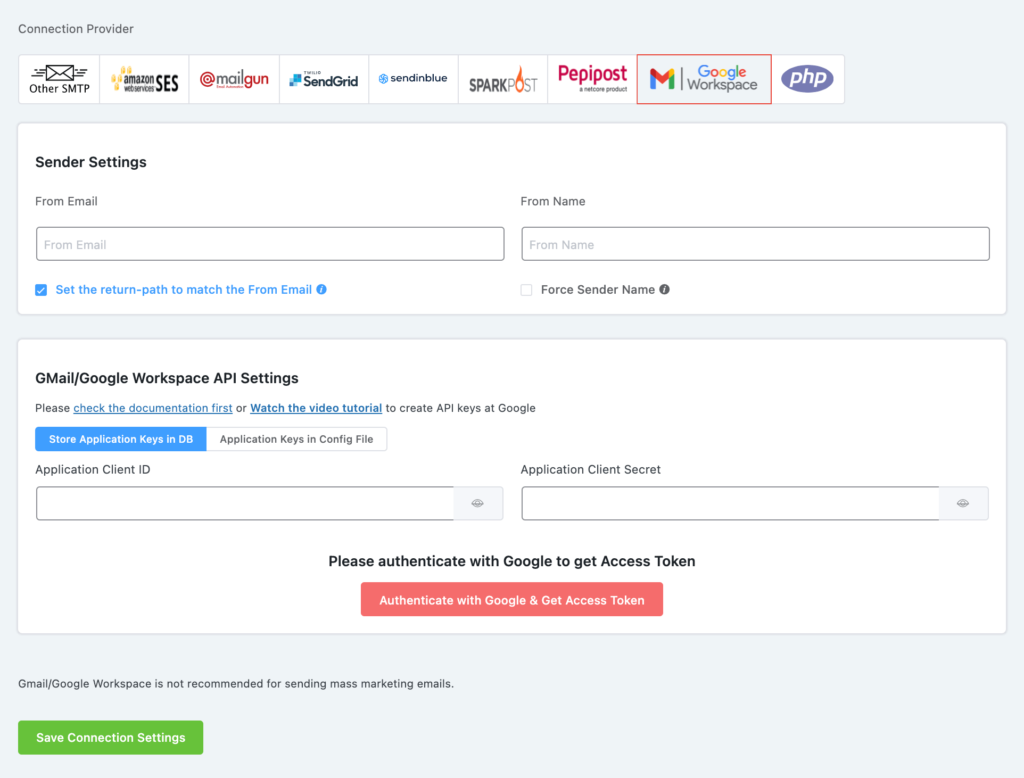
In this part, you need to setup “From Email“, “From Name“, “Application Client ID” and “Application Client Secret” and click the save button.
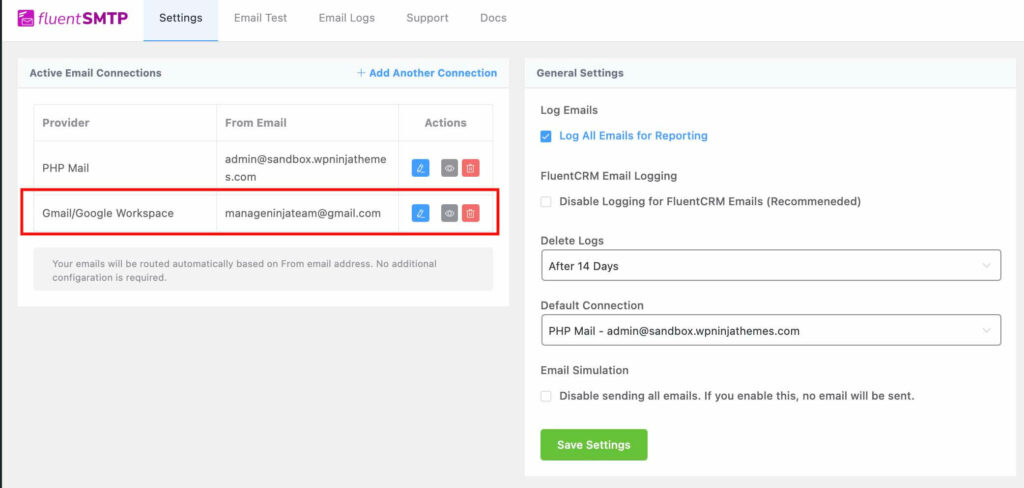
From Email: The “From Email” should be the email you verified with Google Workspace. Check the box to set the return path to match the from. The Return Path indicates where non-delivery receipts – or bounce messages – are to be sent. If unchecked, bounce messages may be lost. With this enabled,
you’ll be emailed using “From Email” if any messages bounce as a result of issues with the recipient’s email.
From Name: From name can be anything you want. The best practice is to use the combination of your name and company name. For example, I would choose something like “Jewel From WPManageNinja” where Jewel is the first name of the CEO and WPManageNinja is the company. The Application Client ID and Application Client Secret will be provided by Google Workspace.
How to get API Key and Secret: #
In this part, you have to go through multiple process, these processes are as below:
Create a new API credential project in Google Cloud Platform:
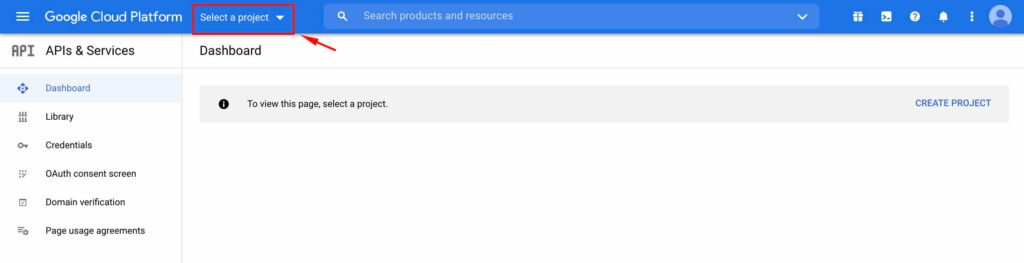
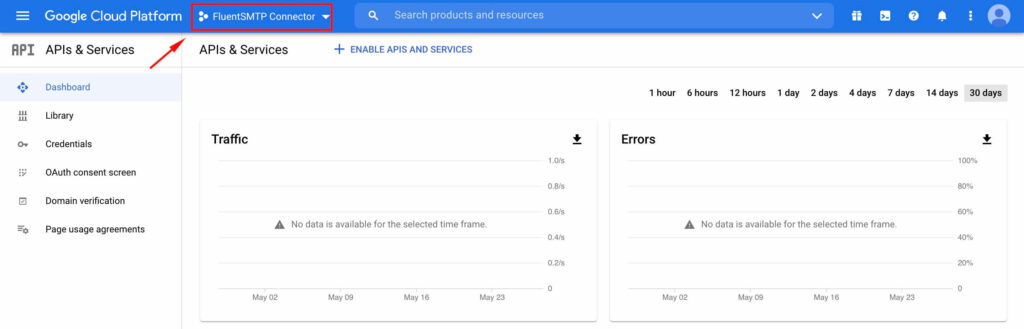
Go to Google Cloud Platform by clicking on this link – https://console.cloud.google.com. From the dashboard click on the Select Project.
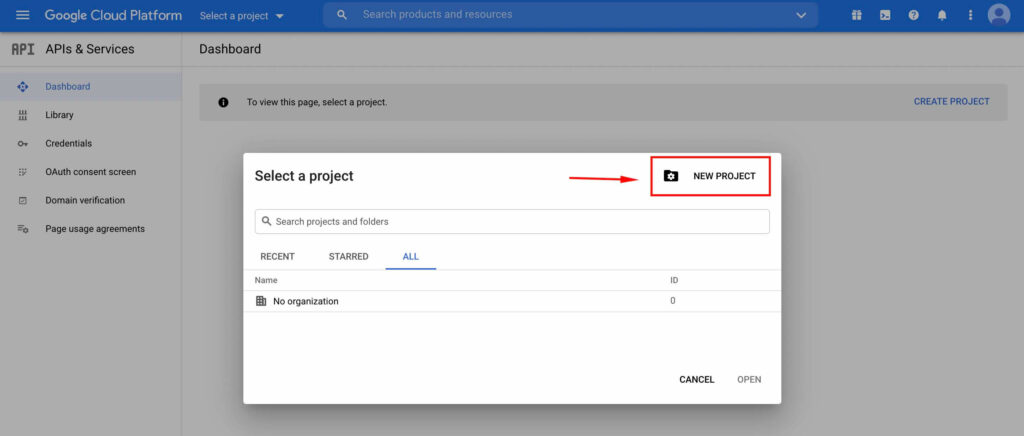
A popup will appear, click on the NEW PROJECT button.
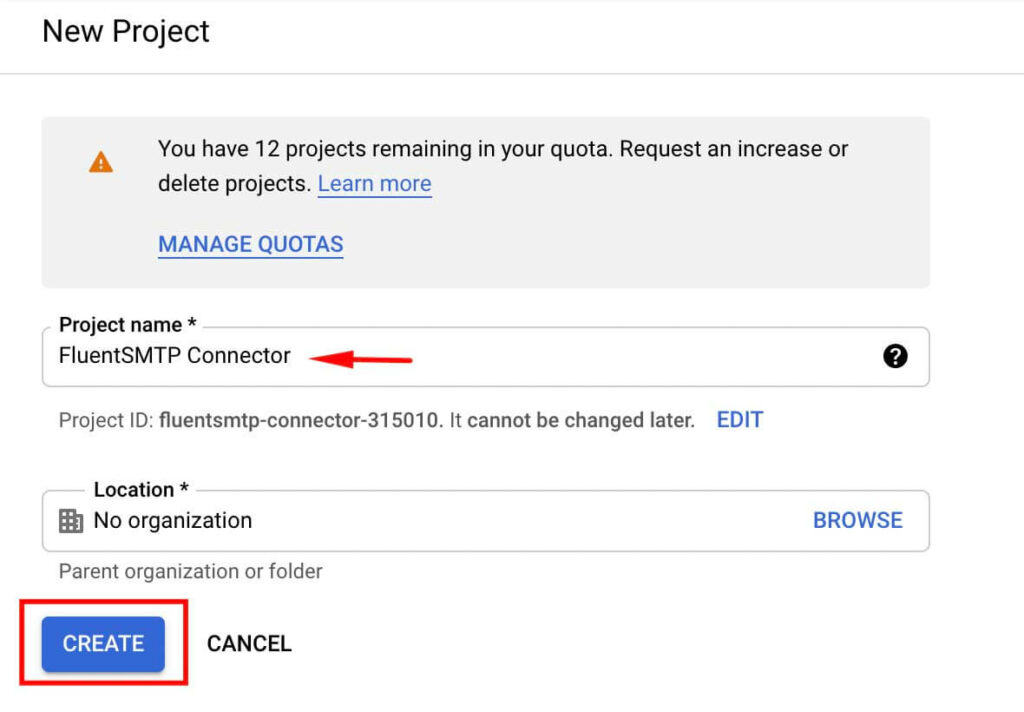
Give a Project name and hit on the CREATE button.
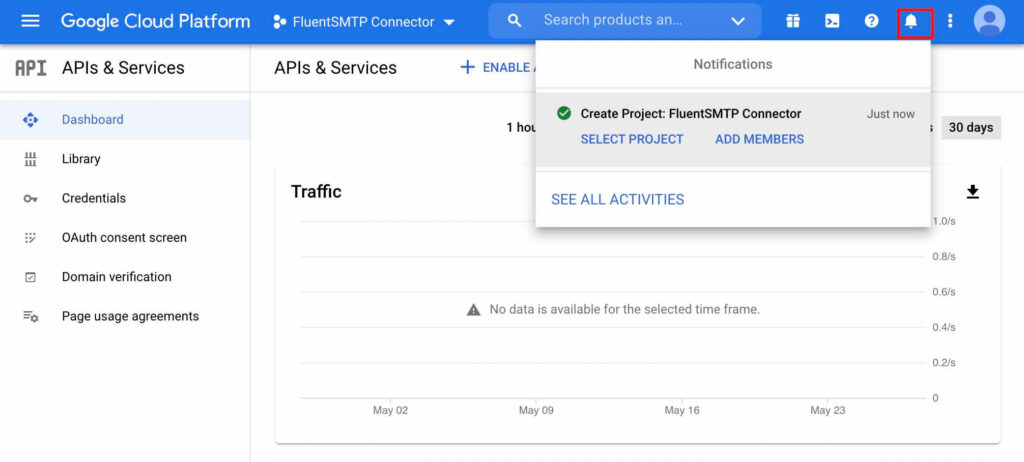
A notification will appear which will confirm that a project has been created.
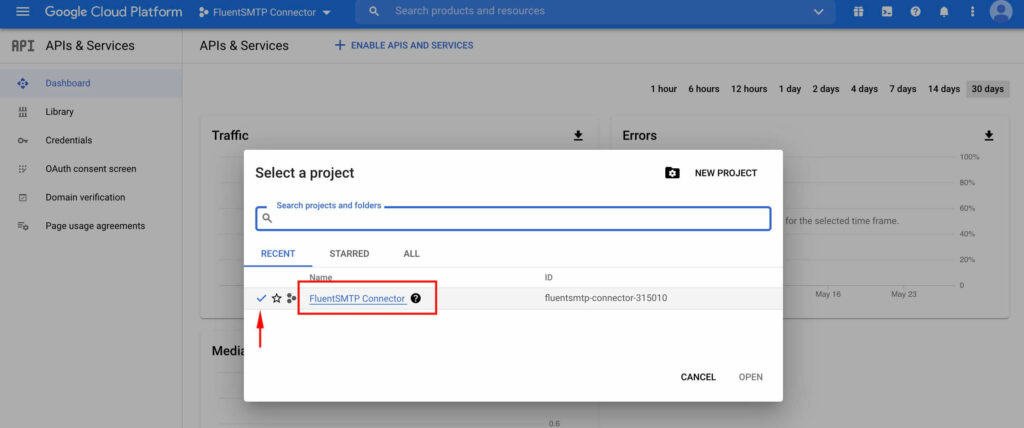
Now, if you have existing projects on your Google Cloud Platform, you need to select your newly created projects as default. To do that click on the dropdown as shown in the screenshot.
Select the newly created project (For my case its FluentSMTP Connector), you can see a checkmark on the left side in the selected projects name.
Enable Gmail API:
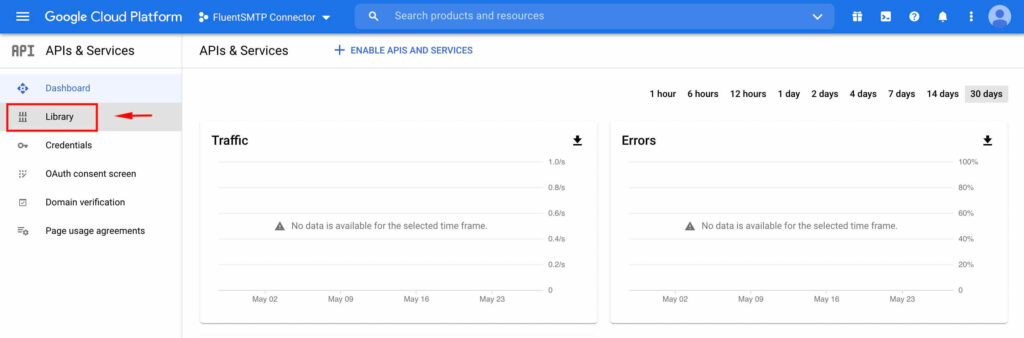
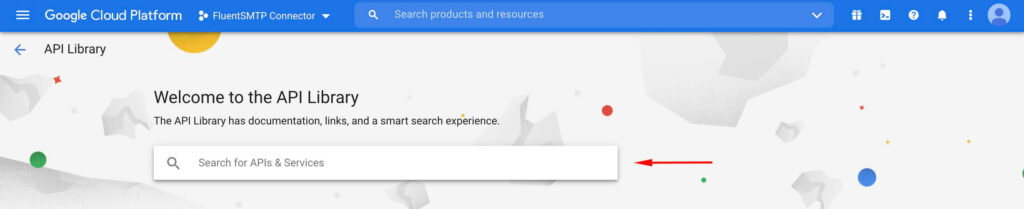
Click on the Library from the left sidebar.
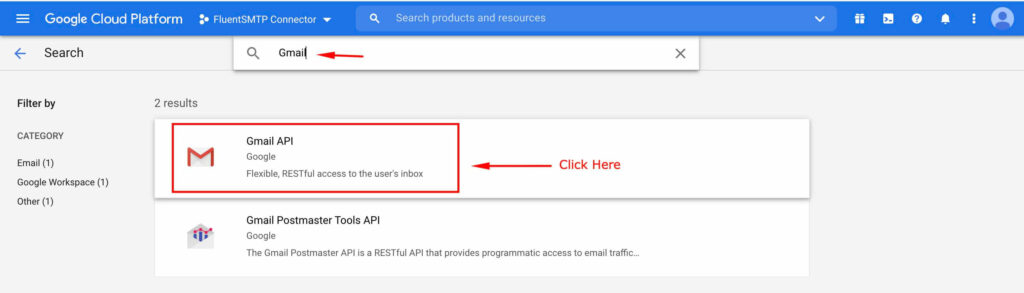
On this page, you have to search for Gmail.
Click on the Gmail API.
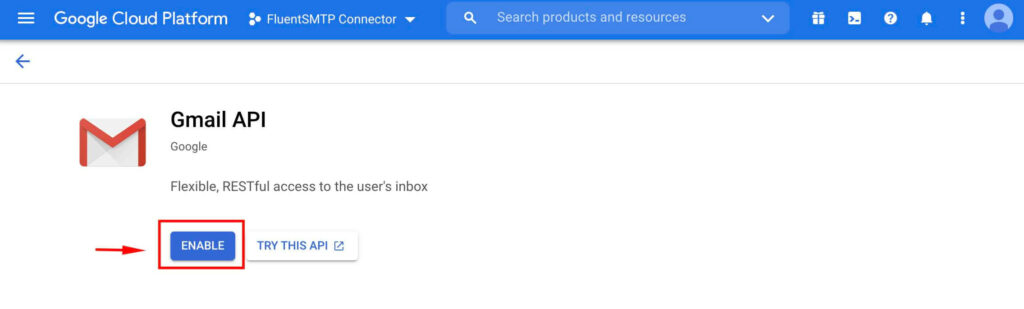
Now click on Enable button. It will take some time and will redirect you to Gmail API dashboard .
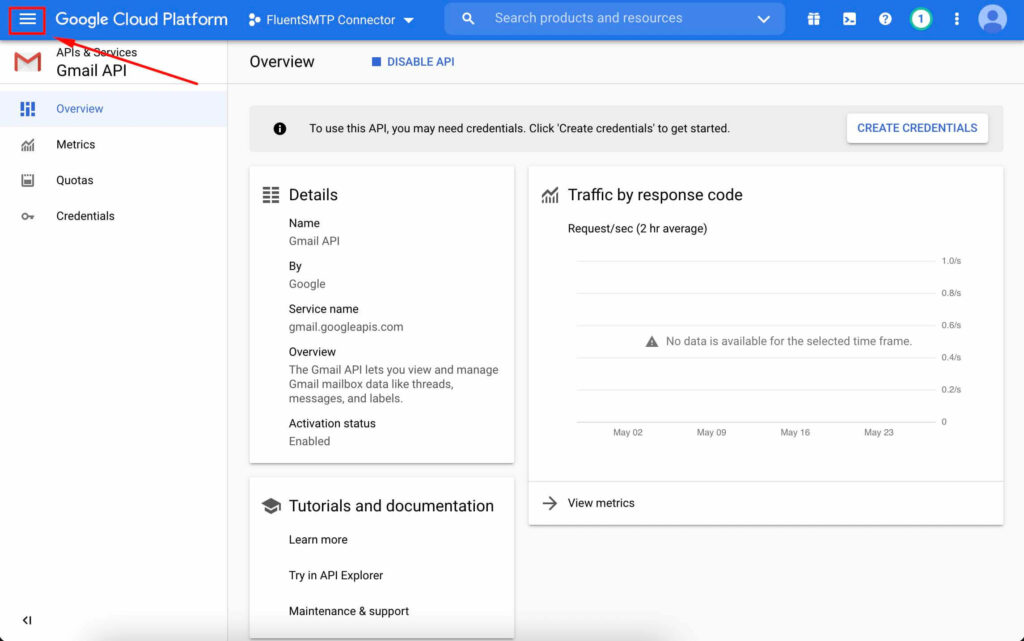
From the Gmail API dashboard, click on the Hamburger icon.
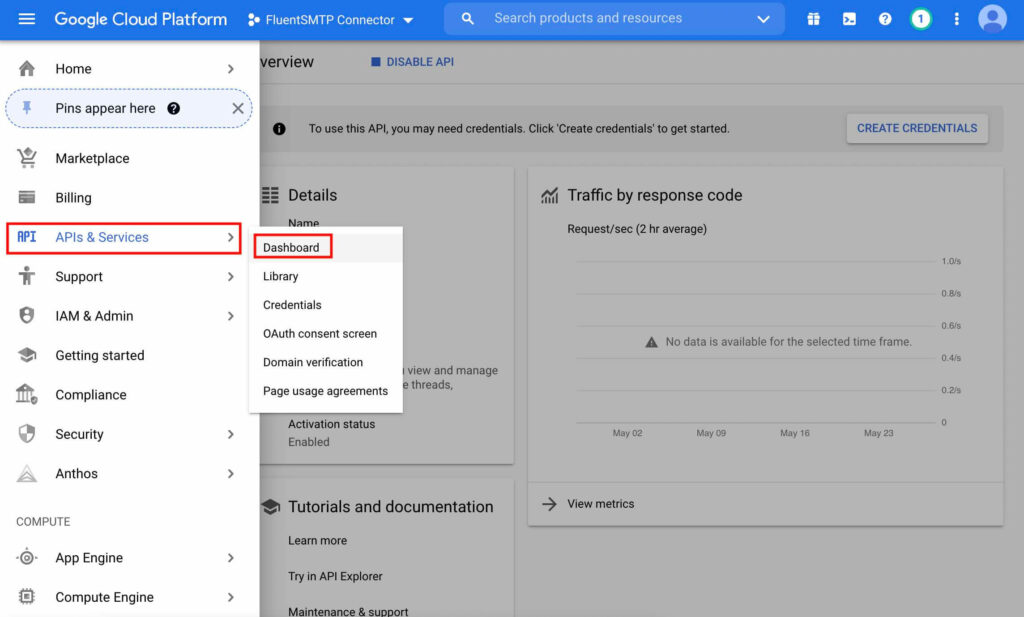
Select APIs & Services -> Dashboard. It will redirect to Google Cloud Platform dashboard.
Set Up OAuth consent: #
From the Hamburger Menu, click on the OAuth consent screen. You will get two radio item.
- If you are a Google Workspace user, select Internal so that it will bind with your workspace domain or email.
- For all other cases or every cases, you can choose External.

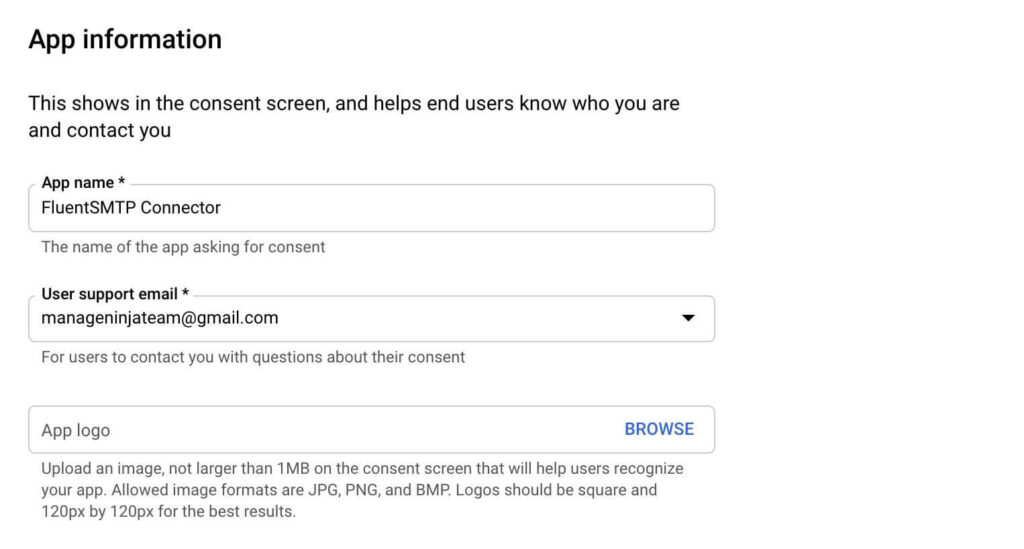
On this screen, you need to provide various information. In the App information section, Give an App name (It can be anything), select your email in the User support email section. You can add App logo too, but its not required.
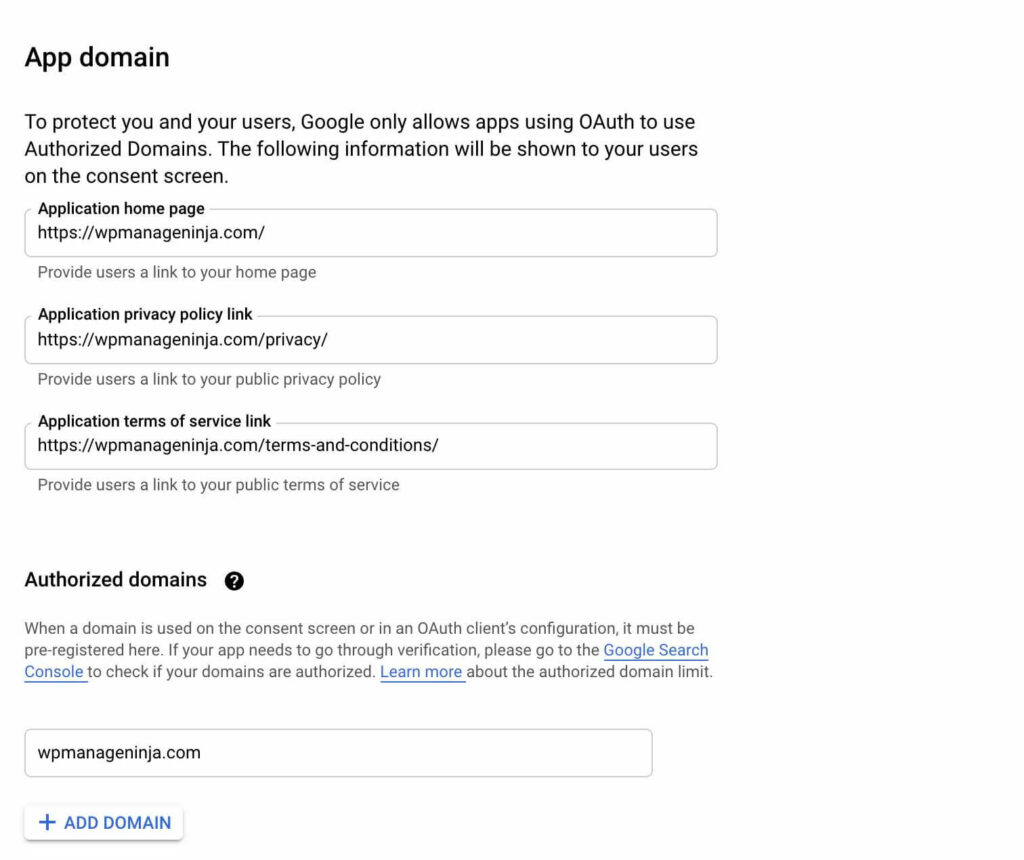
In the App domain section, you can provide your homepage, privacy, terms & services links (Not required). But you must use your website url (without http:// or https://)
In the Developer contact information, you can use any email so that google can notify you about any changes to your project.
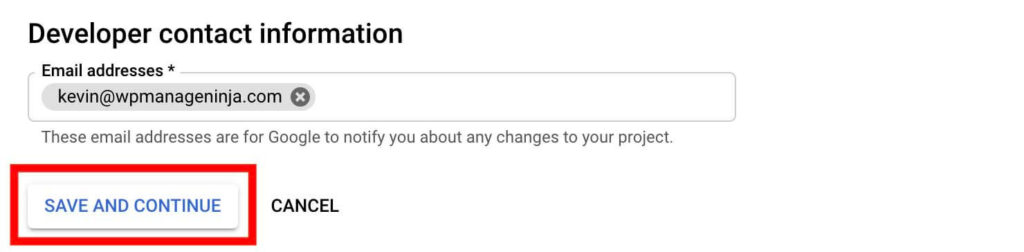
Click Save and Continue button.
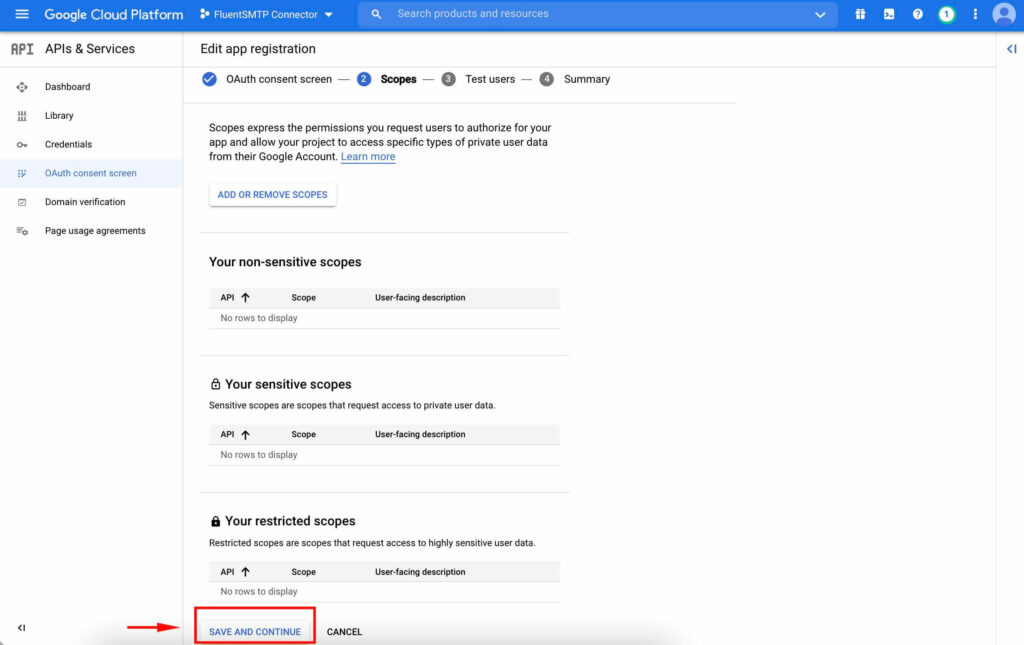
In the Scope section, you don’t have to add any details, just click Save and Continue button.
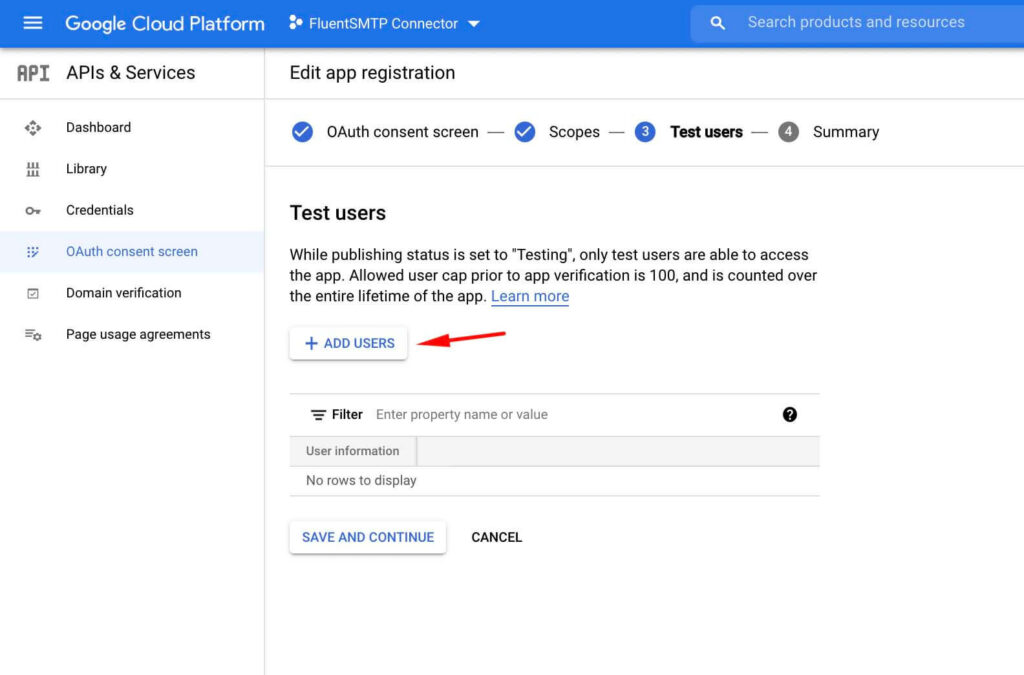
This is a very important steps, we need to add the email that we will use as a sender. To do that, click on the ADD USERS button.
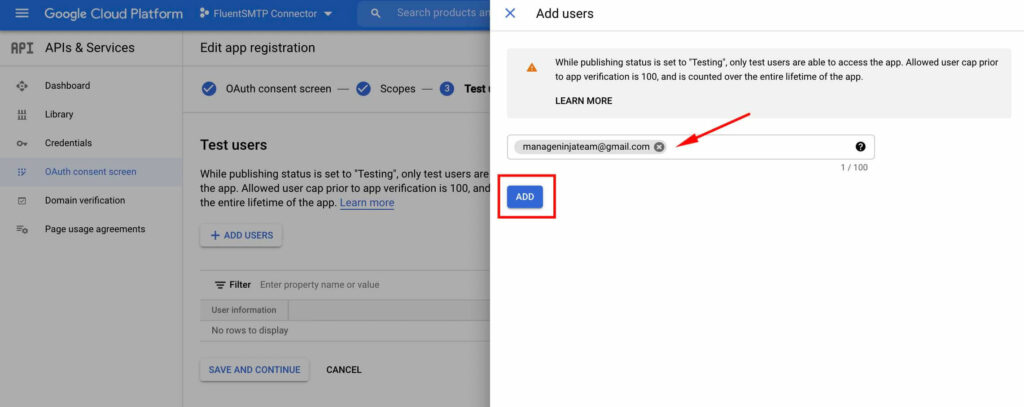
On the right popup, type your email address and click on the ADD button.
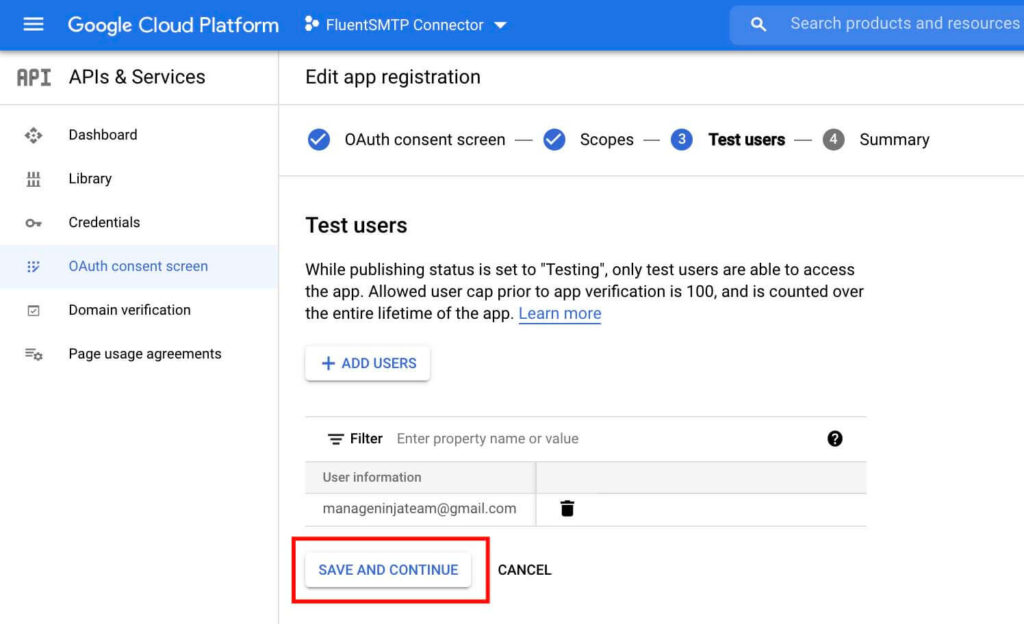
You can always add/edit emails later from this screen. After adding the email as a user click on the Save and Continue button.
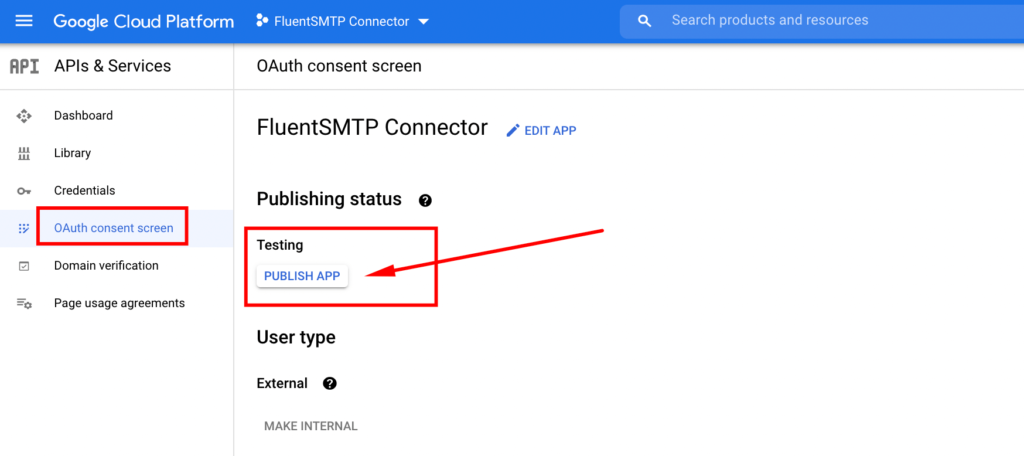
Now from the same 0Auth consent screen option, click on PUBLISH APP button and confirm the setting.
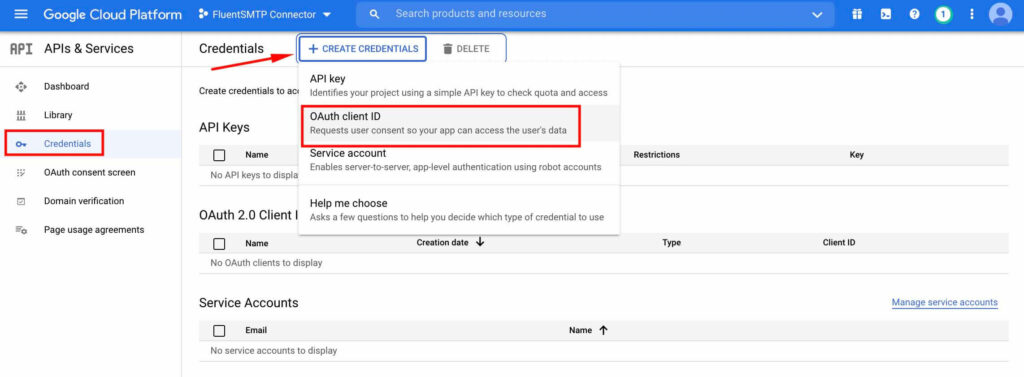
Create OAuth client ID credentials
Now go to Credentials fro the hamburger menu. Click on the Create Credentials button and select OAuth client ID.
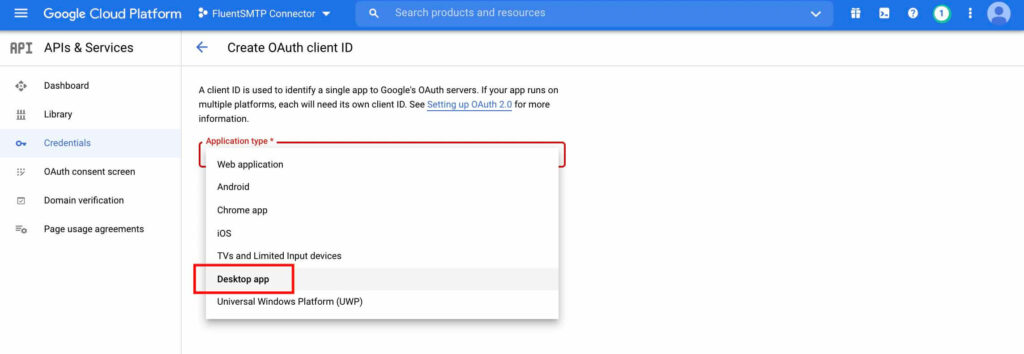
Select Desktop app as the Application type.
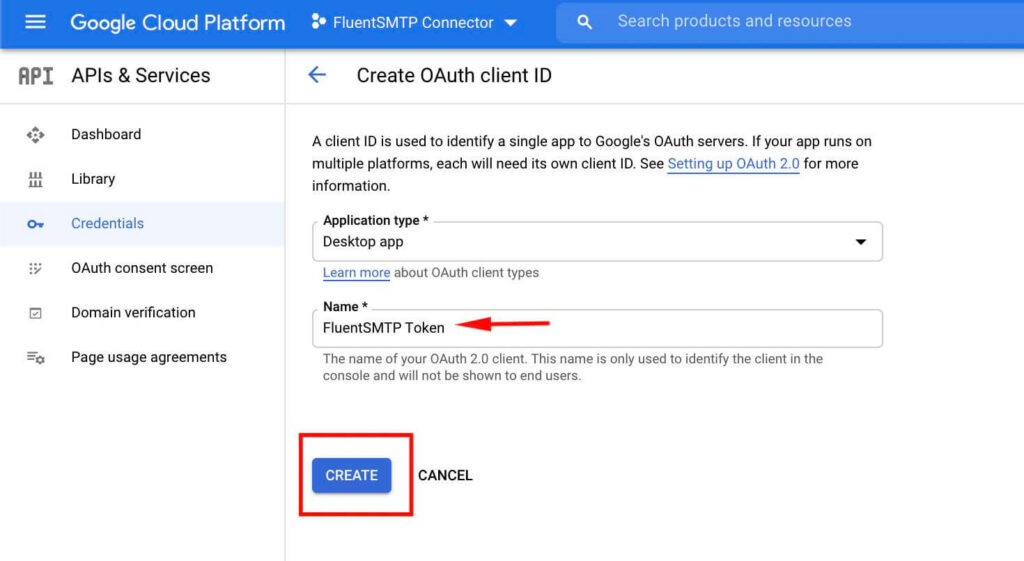
Give a name, you can type anything for example: FluentSMTP Token. Now hit the CREATE button.
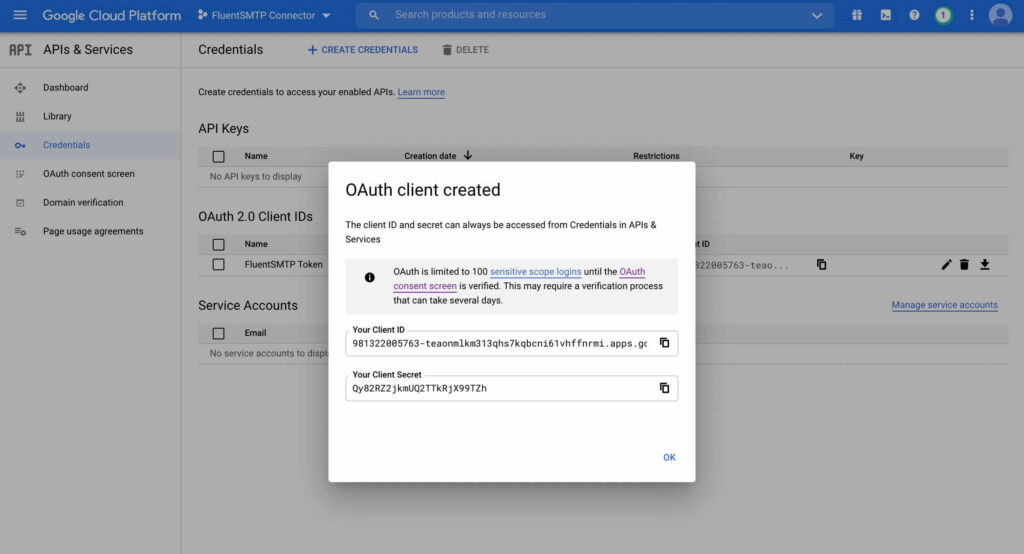
You will be given a Client ID and a Client Secret on a popup window. Simply copy them by clicking the copy icon (at the right side).
Now add both Client ID and Client Secret in the respected field in Google Workspace connection setting as bellow. Click on the Authenticate button and it will redirect you to google.
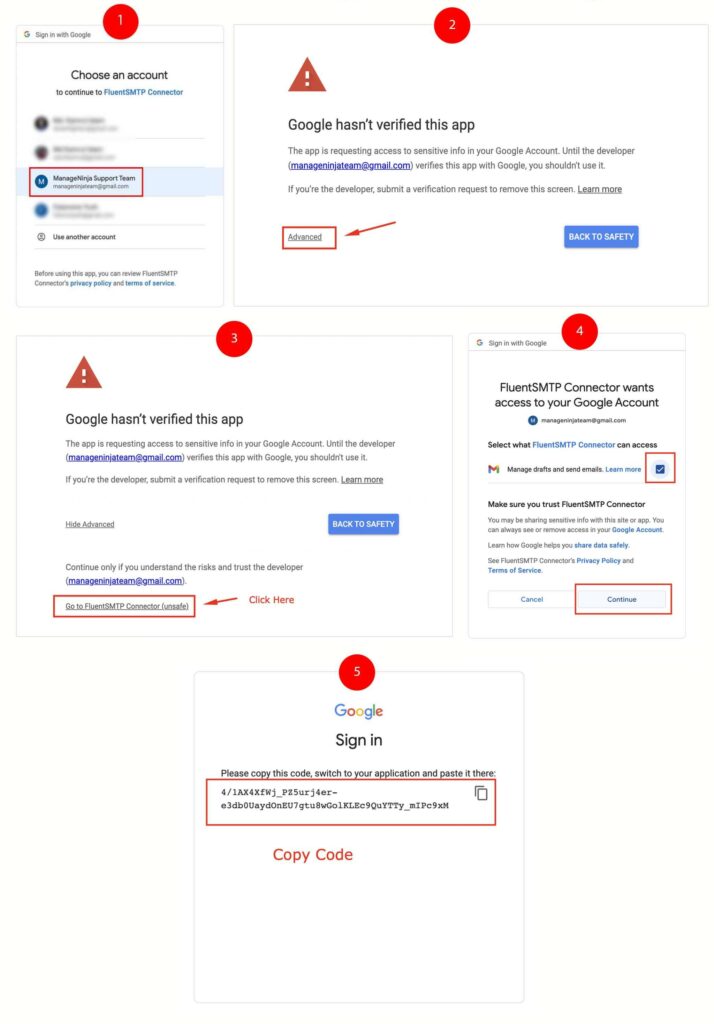
here you need to allow some access:
- Select the email.
- As your newly created app is a local app, google can’t verify it. Dont worry about the notice, click on Advanced option.
- Click Go to connector (unsafe) option.
- Check the Manage Drafts and send emails option and confirm your choice by clicking Continue.
- Copy the code by clicking on the copy button at the right side.
Now paste the code (that you just copied) in the Access Token box.
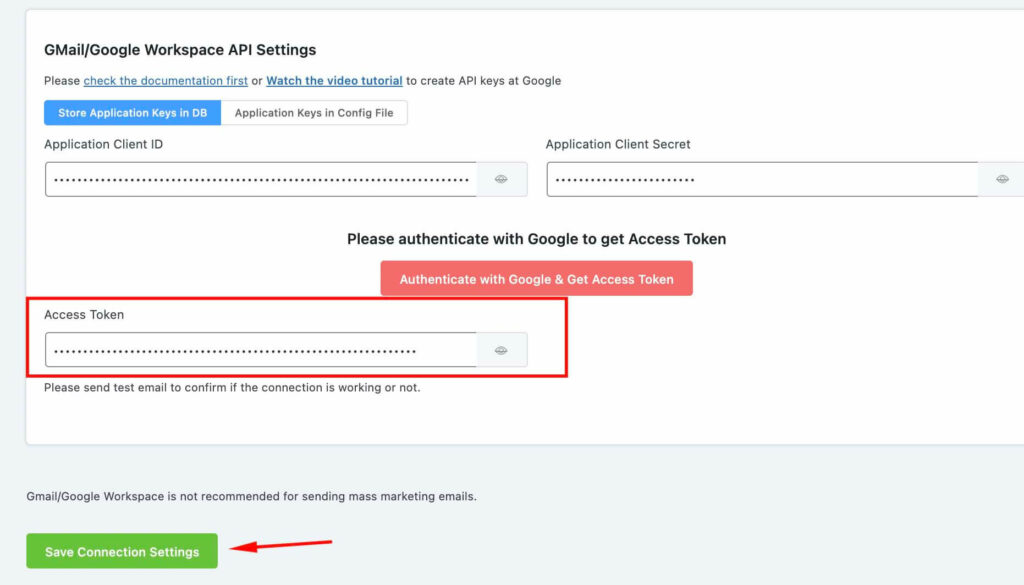
You should see it saved as below.