WP Fluent Forms comes with many pre-built Quick Forms to save your time. Here is how you can deploy and customize them.
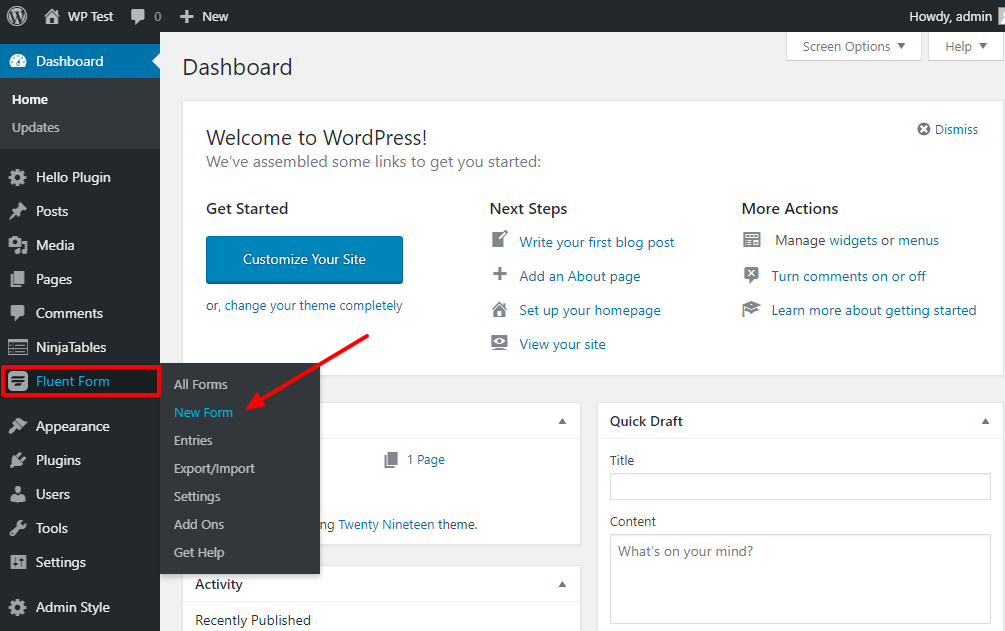
- Click on the New Form button on your WordPress admin panel’s WP Fluent Forms menu. Or you can also create a new form by clicking on the Add Form button from the All Forms dashboard.
- Clicking on the New Form/Add Form button opens a pop-up that allows you to choose from many pre-built Quick Form templates:
- Contact Form
- Support Form
- Event Registration Form
- Conversational Form
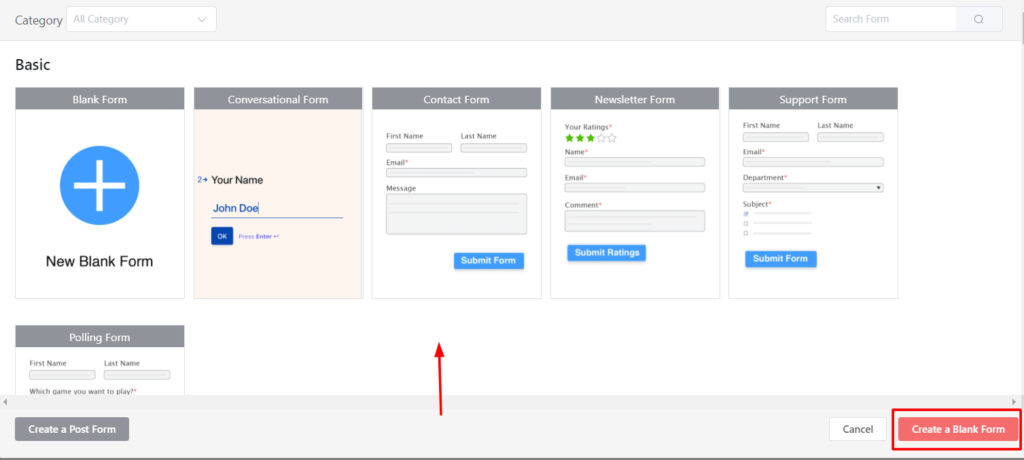
- Browse through category or search, then click on the Quick form you need to use.
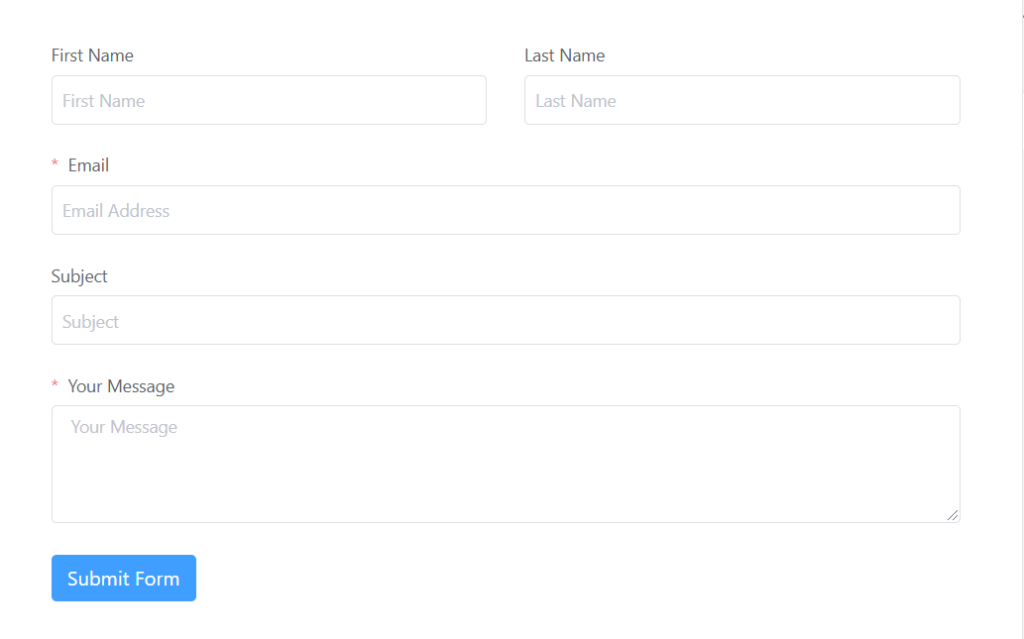
- If required, Customize the Fields. WP Fluent Forms comes with various options to enable you to customize the fields you intend to use. To customize an added field, hover on it and click on the Edit icon. You can also click on the Input Customization tab on the right sidebar. These customizations offer you various options starting from renaming a field, defining a placeholder, and positioning a field label to define the maximum size of an uploaded file.
- Done with the customization and everything? Click on the Save Form button on the top-right corner of your screen.
- Now copy the Shortcode and paste it on the page you want your form to be visible.


